

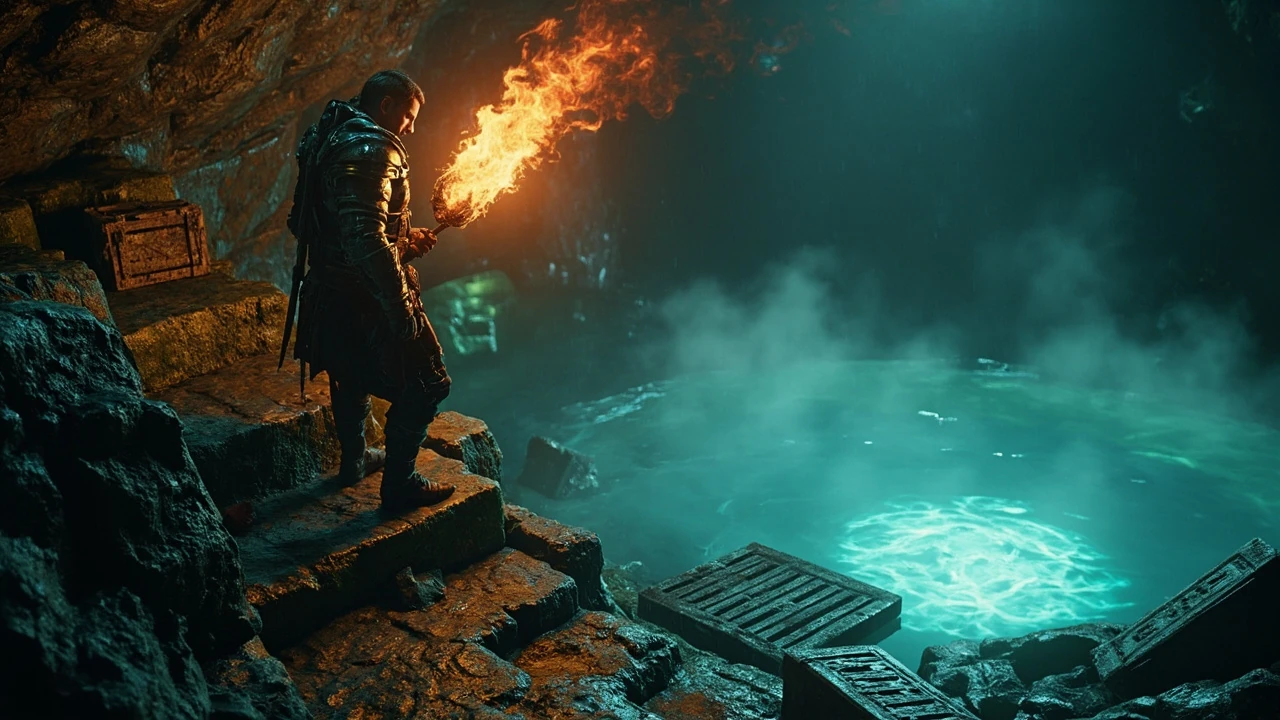
Secret of the spring Diablo 4 side quest: what you need to know before you start
The secret of the spring Diablo 4 quest sits in the same investigation bucket as a handful of other short environmental tasks scattered across Hawezar and the Dry Steppes. It does not gate the campaign, it does not branch a story beat, and it is easy to miss if you only chase the next yellow exclamation mark. What it does give you is a chunk of XP, one piece of gear that scales to the zone you find it in, and a small Renown tick toward the area you picked it up from. Most players who run into it are already moving between a stronghold and a side dungeon, and they only realize it was a quest once the log entry pops up.
The thing that separates this quest from a standard “go here, kill this, come back” task is the trigger. There is no NPC, no scroll, and no escort. The quest exists to reward the habit of reading the world: noticing that a piece of scenery is interactive, following a short chain of clues, and only then pulling a fight. Once you have done it once, the same shape shows up in roughly a dozen other short investigations across Sanctuary, and you start spotting the next one from the doorway.
Before you walk in, a few practical details. The quest’s recommended level scales with your character, but the enemies in the area are tied to the zone, not to the quest marker, so the difficulty is really about where you find the trigger rather than the quest itself. It is soloable from start to finish, has no multiplayer check, and does not require a specific class, weapon, or build. The cave is small, so carrying one or two healing potions and keeping a free inventory slot for the reward saves a restart. The full run, including the altar fight, fits inside a five-minute window on a normal World Tier.
Where the secret of the spring quest actually starts
The starting point is not a quest giver. There is no NPC to talk to, no scroll on a table, and no glowing sigil on the ground. The quest is triggered by interacting with a specific environmental object inside a ruin or cave. In practice, that means you usually discover the quest by accident while exploring, glance at your log, and see the entry pop in. A lot of players miss the trigger for that exact reason: they walk past the right object twice without ever focusing on it.
The two locations that get reported most often are inside a collapsed shrine east of a small Dry Steppes waypoint, and in a flooded cave entrance tucked into the southern cliffs of Hawezar. The map icon once the quest is live is the small open-book investigation marker, the same one used for several other short side investigations. If you are hunting the quest on purpose, the cleanest method is to clear the nearest stronghold first and then sweep the surrounding area for any cave or sunken structure that is not part of a named dungeon. The trigger is rarely on the main road, and the cave entrance is usually half-hidden behind a slope or a wall of brambles.
Once you interact with the correct object, a short line of text describing the spring appears, and the entry “Secret of the Spring” is added to your quest log under Investigations. From that point on, the quest behaves like a normal side quest: you can track it on the map, abandon it, and re-trigger it later by interacting with the same object. If you interact with the wrong object by mistake, nothing breaks, and the quest simply does not start. There is no penalty for exploring the area and finding nothing, which is why most players stumble into the quest on a regular route rather than hunt it down.
Step-by-step walkthrough
The quest has three core objectives once it has been started. The wording on the tracker shifts a little with patches, but the underlying flow is consistent. The whole sequence is built to be cleared in a single visit, with no backtracking to a town vendor or stash.
- Investigate the spring. Walk to the glowing water source the trigger reveals. You do not need a specific item, mount, or skill. The interaction is a short prompt, and a brief lore entry is added to your codex once it completes.
- Search the surrounding ruin for the missing piece. The quest marker leads you to a small cluster of broken containers, collapsed shelves, or submerged crates near the water. Interact with the highlighted object to pick up the key item for the final step.
- Return the offering to the altar. A small altar is revealed at the opposite end of the cavern. Place the item on it. A short cutscene plays, a small group of enemies spawns in, and once they are defeated, the quest completes.
The fight at the end is tuned as a normal trash pack, not as a mini-boss. Expect a mix of melee and ranged enemies, with one elite at higher difficulties. There is no timer on the encounter, so you can pull the group carefully, kite them into the open area near the spring, and use the same defensive cooldown rotation you would for any comparable pack in the zone. The cave is small enough that you can hear the spawn sound from across the water, which gives you a second to reposition before the enemies reach you.
One small but useful detail: the key item you pick up during step two is not consumed by the altar interaction in the way a quest token usually is. The interaction still checks that you have the item, and the item disappears from your inventory once the altar fires, but it does not count against any other quest. If you pick the quest up on a character that already had a full inventory, leave one bag slot free before you start the run, or the item will silently route to your stash and break the altar step.
Choices, branches, and whether your decision matters
Several players ask whether there is a moral choice attached to the quest, in the style of a few of the longer Diablo 4 side arcs. The short answer is no. The quest is a fixed-resolution investigation. You do not pick a side, you do not choose to keep or destroy the relic, and there is no alternate ending. The reward is the same on every character, and the only meaningful choice is the order in which you clear the spawn at the end.
There is one soft decision worth thinking about: whether to wait until you have finished the rest of the local dungeon before triggering the final altar. Because the altar spawns a fight, popping it while other enemies are still in patrol range can stack two packs on top of you. On higher World Tiers, that mistake is the difference between a clean clear and a long revive run. The safer habit is to clear the visible area, then interact with the altar last. The same principle applies on a seasonal character: kill everything else first, because the spawn is rarely the only threat in the cave.
There is also a small build decision that some players overlook. The altar fight takes place in a narrow chamber with a pool of water in the middle. If you are running a ranged build, the water is a useful kiting tool but also a hazard, because several ground-targeted abilities root on contact with it. If you are running a melee build, the same pool is a place to avoid standing in. Either way, plan your positioning before the cutscene ends, because the first enemy is on you in under two seconds.
Rewards, scaling, and when the quest is worth doing
The quest rewards four things: experience scaled to your character level, one piece of equipment that drops at the level of the zone where you completed it, a small bundle of crafting materials, and a small amount of gold. The exact gear slot is not fixed, so on one character it can be a weapon and on another a piece of armor, and the rarity depends on your World Tier and the item power brackets in effect for that patch. The crafting bundle is small but consistent: enough leather and iron to push one or two early upgrades, which matters on a fresh character more than on a Paragon 200 farmer.
On a fresh character, the quest is a strong pick. The experience is meaningful early, the gear jump helps while your item power is still catching up, and the time cost is low because the objectives cluster in one small area. On an endgame character, the quest loses most of its value as a source of loot, but it remains useful for two reasons: it counts toward local Renown in the zone, and the codex entry provides a small permanent lore bonus that stacks with the rest of the area’s codex. If you are working on the seasonal journey, the codex entry can quietly push a Renown bucket you have not finished yet.
| Reward type | What you actually get | Scales with level | Worth doing at endgame |
|---|---|---|---|
| Experience | Chunk of XP tuned to your level | Yes | Low value, only relevant during leveling |
| Gear | One randomized weapon or armor piece | Yes, drops at zone item power | Outclassed quickly by Helltide and Nightmare Dungeon drops |
| Crafting materials | Small bundle of common and uncommon mats | No | Mildly useful for early iron and leather crafts |
| Gold | Modest gold drop | No | Negligible at endgame, useful while leveling |
| Codex | Permanent lore entry that contributes to zone Renown | No | Yes, the main reason to redo it on alts |
How the quest fits into a wider leveling route
If you are planning a leveling route through the same zone, the secret of the spring quest is a good anchor for a short sub-route. Start at the nearest waypoint, run to the trigger object, pick up the quest, then chain the three objectives in a tight loop that also picks up two or three other local side tasks and a dungeon on the way back. Because the objectives are clustered, you can complete the entire arc in roughly the same time it takes to clear a single dungeon, which is a strong time-to-reward ratio during the campaign.
A useful pattern is to treat each zone’s investigation-style quests as a single batch. They tend to share environmental triggers, the same codex reward category, and similar enemy density, so doing them in a single sweep is faster than bouncing back and forth between them and the main storyline. The secret of the spring quest is a good entry point into that habit because it is short, the objectives are obvious once the trigger fires, and the failure mode is small. If you have already cleared the local stronghold, you have a clear map of the area, and the cave is usually within a short ride of the stronghold entrance.
On a seasonal character, the same route also lines up well with the early seasonal mechanic, because most seasonal content drops a waypoint or a small event into the same zones where these investigations live. You can pick up the quest, do the seasonal event, and clear the spring on the same circuit without losing more than a minute of travel. On a non-seasonal character, the route still works as a quiet way to keep Renown ticking while the main campaign asks you to cross the map.
Common problems and how to fix them
Because the quest is environmental rather than NPC-driven, a few specific issues come up more often than others. None of them are serious, but they can be frustrating if you do not know what to look for. Most of the bugs are interaction-related rather than combat-related, which means they are usually fixable without leaving the cave.
- The quest does not appear after you interact with the object. This usually means you hit the wrong object. The correct trigger is a specific interactive piece of scenery, not every broken crate in the area. Walk slowly and look for a prompt that references the spring rather than a generic “search” line.
- The final altar does nothing when you approach it. Make sure you have the key item from the previous step in your inventory. If your bags were full and the item was auto-sold or sent to the stash, the altar interaction will not register.
- Enemies do not spawn and the quest stalls. This is a known minor bug on some patches. Leaving the area, mounting up, riding roughly fifty meters away, and returning to the altar usually resets the encounter.
- The quest marker points underground, but you cannot find an entrance. Look for a crack in the wall, a half-submerged grate, or a collapsed section of floor. The cave entrance is intentionally hidden, and the prompt to “investigate” only appears once you are close enough.
- The codex entry does not unlock after the quest completes. This is a UI bug, not a data bug. The entry is recorded, but the codex window sometimes needs a relog to display it. Closing and reopening the codex from the main menu usually clears it.
If none of those fixes work, the next step is to abandon the quest from the log, leave the zone entirely, and return to the trigger. That almost always resets the encounter chain. The quest is short enough that restarting it costs very little time, and it is more reliable than waiting for a patch to address the specific interaction bug.
Tips for higher World Tiers
On World Tier 3 and World Tier 4, the quest is mechanically the same, but the spawn at the end of the altar is meaningfully harder. The elite that joins the trash pack has more health, applies stronger crowd control, and can one-shot a soft build if you stand in a bad spot. The simplest mitigation is to pull the pack toward the spring itself. The open water gives you more room to kite, and the geometry around the altar tends to funnel enemies into a narrow choke that is easier to manage.
It is also worth pre-potting before you click the altar. Because the spawn is a guaranteed combat encounter, treating the interaction as the start of a pull rather than a quest step is a useful habit. If you are running a build that relies on a long setup cooldown, pop it the moment the enemies appear so the elite is the first thing your rotation hits, rather than the last. The cave is small enough that line-of-sight breaks are rare, so do not expect a wall to peel an enemy off you. Kiting in a straight line toward the cave mouth is usually safer than trying to lose line of sight in the water.
On World Tier 4 specifically, the elite can apply a chill or freeze that locks you in place for a second or two. If you are running a build without an immediate Unstoppable skill, the safest pre-pull is a defensive cooldown plus a healing potion, and the fight should be over in well under a minute. If you are running a summon build, the spawn is a non-issue, and the only reason to clear the quest is the codex entry.
| World Tier | Spawn difficulty | Recommended prep | Time cost |
|---|---|---|---|
| Tier 1 | Light trash, no elites | None | Under 2 minutes |
| Tier 2 | Standard pack | One healing potion | 2 to 3 minutes |
| Tier 3 | Pack plus a rare enemy | Defensive cooldown ready before altar click | 3 to 5 minutes |
| Tier 4 | Pack plus a tougher elite with crowd control | Full pre-pull prep, pull toward the open water | 4 to 6 minutes |
How it compares to similar short investigations
Diablo 4 has a small family of quests that look and feel like the secret of the spring: short, environmental, three-objective, and tuned to be completed in one short play session. The comparison is worth making because the rewards and pacing across that family are not identical, and a player who is trying to plan a route will want to know which of them to prioritize. Some reward combat, some reward patience, and a few reward nothing more than a quick codex entry, so the right order depends on what your character still needs.
| Quest | Trigger type | Combat at the end | Loot value | Best moment to do it |
|---|---|---|---|---|
| Secret of the spring | Environmental, no NPC | Small trash pack, one elite on higher tiers | Leveled gear, codex, modest mats | While leveling through the zone |
| Precious Cargo | Environmental crate | No combat, escort-style pickup | Codex, small mat bundle | Any time, very low time cost |
| Culling of Flesh | Environmental altar | Medium pack with a champion | Guaranteed rare drop | When you are already at full resources |
| Treasure of the Deep | Diving prompt in shallow water | Single elite, no trash | Codex, small gear piece | When passing the lake on a route |
Two patterns stand out from the comparison. The first is that the higher-loot investigations also demand more combat, which means they are a worse time investment on a build that is still undergeared. The second is that the codex reward is the one constant across the whole family, so on a character doing a clean Renown sweep, the order of the investigations matters less than the order of the dungeons. The secret of the spring is a reasonable middle of the pack: not the fastest, not the most rewarding, but a reliable filler between two larger objectives.
Designing the route around the quest
If you are planning a route rather than picking the quest up opportunistically, there is a small design choice to make. The objectives are tight enough that you can fold it into a larger sweep, but loose enough that running it as a side trip is also fine. The deciding factor is what else is near the trigger.
When the trigger is close to a main story beat, do the quest on the way back, not the way out. The cave is a dead end, so it costs you very little detour to clear the spring on the return leg. When the trigger is in a quiet area with no other content nearby, the quest is a good use of downtime between two larger objectives, especially if your mount cooldown is still ticking. If the trigger sits on the way to a dungeon, clear the dungeon first and pick the quest up on the way out, because the dungeon exit usually funnels you past the right cave mouth anyway.
On a seasonal character, the route question also includes the seasonal mechanic. If the seasonal event is a Helltide-style zone, the cave is a useful place to bank a few minutes between pulls, but it is not worth burning a potion for. If the seasonal mechanic is a Tree of Whispers bounty, the spring can be slotted into the bounty route as a quiet filler objective, with the codex entry as the only real reward.
Using the quest as a teaching moment for similar investigations
The reason the secret of the spring quest is worth a guide, beyond its own modest rewards, is that it teaches a habit that pays off across the entire map. The trigger is hidden, the objectives are clustered, the final step is combat, and the rewards are small but reliable. That same shape repeats in dozens of other places, and a player who has done this quest once will recognize the next one much faster.
A few small habits generalize well from this quest to the rest of the game. Slow down near ruins and cave entrances, because environmental triggers almost always live there. Read the prompt on each interactable object, because the right trigger usually references a specific noun from the quest title. Clear the area before you click the final altar, because most of these quests use the same “interact, then fight” pattern. None of these habits are obvious on a first run, and the secret of the spring is a low-stakes place to learn them.
There is also a small reading habit worth picking up. The Investigations category in the quest log groups these environmental quests together, and once you have done two or three, the icons and the wording start to look familiar. The category is the easiest way to see at a glance which short investigations are still open in a zone, and it saves you from running past a trigger you have already completed.
What to do if the quest is still on your map
If you have been playing for a while and the quest is still sitting in your log, the simplest fix is to travel to the trigger, clear the cave, and turn the quest in. There is no time limit on the entry, and the quest does not expire when a season rolls over. The only practical reason to leave the quest in the log is that you are saving it for a character that needs the experience, which is a legitimate choice during a power-level session. On a character that is already past the relevant level, the value is the codex entry and the Renown tick, both of which are worth a short detour.
The one situation where it makes sense to leave the quest in the log indefinitely is when you are not planning to return to the zone. On a character that is finished with the campaign and pushing Paragon levels, the trip to the trigger can be longer than the time it takes to clear the cave, and the time investment is not worth the small Renown return. In that case, the quest will simply sit in the log until you decide to clean it up, and that is a perfectly reasonable use of your time.
Frequently asked questions
Is the secret of the spring quest missable?
No. The trigger is a permanent environmental object in the open world, so the quest is available on every character that reaches the correct zone. It can be picked up at any level, although the experience and gear value scale to your character when you complete it.
Do I need a specific class or build to finish the quest?
No. The quest has no class check, no build check, and no required skill. Any class can complete it with the same three steps, and the combat at the end is tuned as a normal trash pack rather than a class-specific encounter.
Can the quest be done in co-op?
Yes. The quest works in a standard party of up to four players, the objectives are shared across the group, and the final altar spawn scales to the party size. There is no bonus or penalty for completing it solo versus in a group, so the only reason to bring other players is to make the final fight faster.
What level should I be to do the quest comfortably?
Any level that matches the surrounding zone is fine. The quest’s difficulty is driven by the enemies in the area, not by the quest’s recommended level, so the same character that can clear nearby content can clear this quest without special preparation.
Does the quest reward a unique item?
No. The reward is a randomized gear piece at the zone’s item power, a small bundle of crafting materials, gold, and a codex entry. There is no unique or aspect locked behind this quest, so it is safe to skip if you are optimizing purely for endgame loot.
Why is the altar not responding when I click it?
The most common cause is that the key item from the previous step is not in your inventory, usually because bags were full and the item was stashed or sold. The second most common cause is a minor interaction bug that resolves by leaving the area, riding a short distance away, and returning.
Is the secret of the spring quest worth doing on a second character?
For the gear and experience, no. For the codex entry and the Renown contribution, yes. On alts, the main reason to redo the quest is to finish the local codex, which is a permanent account-wide reward and a small but reliable source of Renown progress.
Can the quest be abandoned and restarted?
Yes. It can be abandoned from the quest log at any point and then re-triggered by interacting with the same environmental object. This is useful if you pick it up by accident while running through the area and do not want to clear the cave right away.
Does the quest change with the season or current patch?
Quests like this are usually stable across seasons because they are tied to the open world rather than to seasonal mechanics, but balance changes to enemy health, item power brackets, and reward tuning can shift the value of doing it. The three-step structure has remained consistent across the game’s running patches.
Where can I find more quests like this one?
Look for the small open-book investigation markers on the map in the same zone, and explore cave entrances and sunken ruins in Dry Steppes, Hawezar, and Fractured Peaks. The same environmental trigger pattern shows up across most regions, and doing them in batches is the fastest way to clear the local codex.





Leave a Reply