

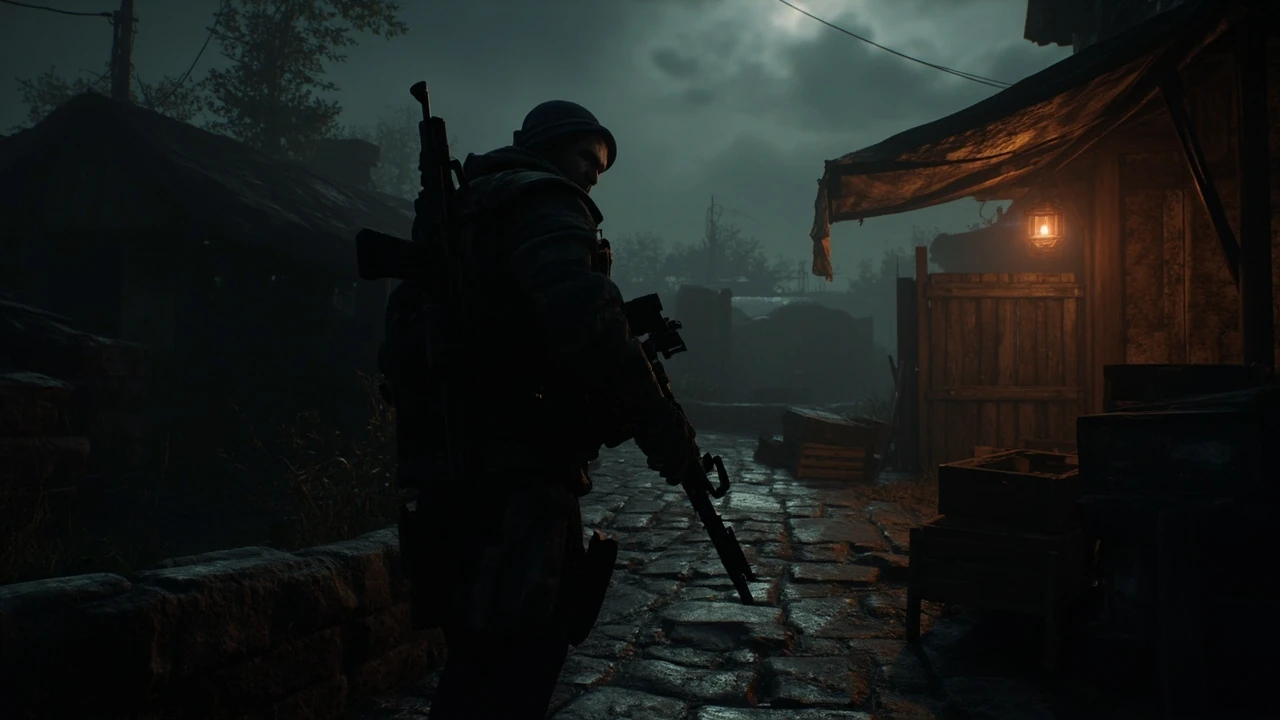
Resident Evil 4 walkthrough as a GameDev field study
A useful Resident Evil 4 walkthrough is rarely just a list of where to go next. The 2005 GameCube original, the 2023 remake, and their ports share the same skeleton: a Spanish village prologue, a castle investigation, an island laboratory, and a closing escape. Between those bookends sit systems that interact in ways that change how a player solves a fight, manages inventory, and decides whether to spend currency on an upgrade or a new weapon. This article treats the walkthrough as a design tour, walking chapter by chapter while pausing on the mechanics that make each section work, the player choices that branch behaviour, and the constraints that shaped the level design.
The 2005 release and the 2023 remake are not identical products, and the differences matter when you read a walkthrough. The 2023 version rebuilt the same structure with modernised controls, an over-the-shoulder camera, contextual aiming, a parry knife system, and new side content such as Requests issued by the merchant. Where this guide is version-sensitive, it calls out the difference. Where the underlying design intent is shared, it explains the mechanism so you can apply the same reasoning to similar systems in other third-person action games.
You should read this page as a working reference rather than a spoiler dump. The opening section frames the game’s structure and the design questions the walkthrough will answer. Subsequent sections move through the campaign in act-sized blocks, with tables that summarise resource pressure, enemy density, and key decisions. The closing section on systems and difficulty explains why certain fights feel different on harder settings, and a FAQ answers the questions a returning or new player most often raises while planning a run.
Why a walkthrough reads differently when you study the design
Most walkthroughs are linear: turn left, shoot, pick up the key, open the gate. That style is useful for a player who just wants to finish, but it hides the reasons the game is built that way. Resident Evil 4 became a touchstone for the action-horror genre because its designers made a small set of repeatable decisions at every intersection: how much information to give the player, when to combine a new enemy with a new weapon, how to limit healing, and how to turn inventory pressure into pacing.
Reading the campaign through those decisions gives a developer or technical learner a portable vocabulary. You can lift the same framework when designing any third-person encounter that has to balance risk, resource spend, and readability. The walkthrough below therefore organises each chapter around three recurring questions:
- What does the player learn here that they will need later?
- Where is the resource budget tightened, and what is the player trading away?
- Which decision in this chapter is most likely to change a future outcome, such as ammo economy, merchant pricing, or boss vulnerability?
The same questions apply to the remake’s side content. The merchant’s Requests in the 2023 version ask the player to break the route into smaller reward loops. Each request introduces a micro-goal, a reward, and a small risk spike, which is a useful design pattern to study for any live-service or progression-driven game.
Campaign structure and how the acts are divided
Resident Evil 4 divides its campaign into numbered chapters that group levels by setting and pacing. The 2005 original ships with twenty chapters plus a closing mission, while the 2023 remake condenses the same structure into sixteen chapters with restructured cutscenes. Both versions move through the same three-act arc: rural Spain, the castle complex, and the island research facility. Each act has a distinct design job.
| Act | Setting | Primary systems introduced | Typical player resource pressure | Key new threats |
|---|---|---|---|---|
| Act 1: The Village | Rural Spanish village and farmlands | Stock weapon upgrades, basic crowd combat, first merchant visit | Low ammo, limited healing items, light inventory | Villagers with pitchforks, chainsaw enemy variant, dogs and crows |
| Act 2: The Castle | Castle halls, dungeons, and catacombs | Plagas mid-bosses, Ashley escort segments, vertical level design | Moderate ammo, growing weapon roster, escort responsibility | Armored knights, Garrador, Verdugo, suit of armour |
| Act 3: The Island | Military research facility and ruins | Heavy combat, regenerators, thermal scope, Krauser knife duels | Higher ammo income but tougher enemies, repair cost, magnum scarcity | Regeneradors, Iron Maidens, U-3, Krauser, final boss phase |
The 2023 remake extends Act 1 and Act 2 with new connective tissue and a small number of side areas. The Island section is shorter in the remake because some set-pieces were reshaped for pacing. If you are following a walkthrough written for the original and playing the remake, expect fewer total chapter transitions but more micro-choices inside each chapter.
Act 1: the village, the farm, and the first economy lesson
The opening chapter is a teaching sequence dressed as a horror scene. The player walks down a forest path, meets a hostile stranger, and learns that the standard reaction is to shoot. Within minutes the game introduces a small enemy group, a knife, a stock-attached handgun, and the rule that aiming at the legs is more efficient than aiming at the head at this stage. By the time the player reaches the village square, the game has taught three things without writing a tutorial label: aim low, conserve ammo, and keep moving.
The walkthrough then converges on the first merchant. He is the first place the player can spend the Pesetas earned from kills, treasure, and exploration. Treat the first merchant visit as a design study in opportunity cost. The player can buy a new weapon, upgrade the existing stock, or save currency for a larger purchase. The game never punishes the choice immediately, but the early currency pool is small, so every spending decision has a noticeable downstream effect.
Chapter flow and what to learn
- Chapters 1 to 3: introduce melee, basic shooting, and the village’s first crowd combat. The player also meets the merchant and learns the upgrade and trade screens.
- Chapters 4 to 6: introduce the cargo truck, the church, and the first chain-saw enemy. The player should learn that some weapons are better against groups while others are better for precision.
- Chapters 7 to 9: introduce El Lago del Tiempo, the island’s precursor, and the mine-cart sequence. Movement and camera control are tested.
The most common new-player mistake in Act 1 is hoarding healing items. The remake’s crafting system makes green herbs and other consumables more accessible, but the original’s finite first-aid sprays punish sitting on resources. The walkthrough principle is to spend healing items as soon as the player reaches a save room, and to enter each new area with one healing item plus the option to craft another.
Act 2: the castle and the escort problem
Act 2 reframes the player’s job. Up to this point the player has managed their own health and inventory. From the castle onward they are responsible for Ashley Graham, a non-combat ally with a health bar and a simple follow AI. Escort segments are a known design risk because the protected NPC can block the player, trigger enemy attention, or die to a single hit. The 2023 remake reduces some of the friction by giving Ashley a command system and tightening her follow behaviour, but the underlying constraint remains: the player now has a second unit to protect.
The castle also introduces Plagas mid-bosses, who replace the standard enemy model. Each mid-boss telegraphs a specific weakness: the Garrador is blind, so aiming at exposed parasites is the only viable strategy; Verdugo is invulnerable from the front and has a chase ceiling. The walkthrough should call out the moment the player first meets a mid-boss, because the previous chapter’s strategy often fails against a mid-boss and the player has to learn a new rule.
Decisions that matter in Act 2
- Ashley command toggles: the 2023 remake lets the player park Ashley in safe zones. The walkthrough should identify each safe zone and the reason the player wants to use it, typically to free up healing for the player rather than to manage a scripted attack.
- Crown and Salazar family rooms: treasure spawns are conditional on path taken, and the player who returns to a missed room after a mid-boss can be locked out by story progression. Treat the castle as a single-pass area on the first run.
- Weapons to upgrade first: in the original 2005 release, the Riot Shotgun is the most cost-efficient Act 2 upgrade because it lets the player thin groups without burning handgun ammo. The remake balances the Shotgun differently, but the principle of investing in a crowd control weapon before precision weapons is the same.
The escort and mid-boss layers compound the resource budget. The player who enters a mid-boss with an empty healing bar and low shotgun ammo is one mistake from a long reload. The walkthrough advice for Act 2 is to enter every new area with a repair kit, a full magazine of the player’s preferred crowd weapon, and one precision weapon for parasite shots.
Act 3: the island and the difficulty spike
Act 3 is the design payoff. The village and the castle have taught the player how to read enemy telegraphs, manage an inventory, and protect a follower. The island tests those skills against enemies that punish the earlier strategies. Regeneradors absorb body shots and require a specific scope to kill. Iron Maidens are resistant to small arms and have a high stagger threshold. Suit-wearing soldiers and an enhanced Krauser bring the player’s accuracy under pressure.
The 2023 remake adds stealth sections and new mini-bosses that change the route between rooms. The walkthrough must therefore indicate whether a recommended path assumes the player is sneaking or fighting, because the same room can have two optimal solutions and the wrong choice wastes ammo in both.
Where the system design tightens
- Ammo economy: island enemies drop more ammo per kill, but the enemies also require more rounds. The walkthrough principle is to spend magnum rounds on mid-bosses and to use the default rifle for the steady crowd.
- Repair kits: weapon durability is a hidden budget. The walkthrough should remind the player to repair before a final boss attempt, not after.
- Save room density: the island has fewer save rooms than the castle, and a single bad run can cost the player ten minutes. The walkthrough should flag the save room before each escalation.
The closing mission is a stress test of everything the game has taught. The walkthrough closes by walking the player through the final boss phases and the moments when the player’s ammo inventory and weapon state matter most. The final phase is not the most difficult in the campaign in design terms, but it is the moment where all earlier decisions converge, which is why a walkthrough that does not account for the player’s remaining resources can leave the player stuck.
Enemy behaviour and how it shapes route planning
Resident For additional context, Evil 4 is famous for its enemy cast because each enemy forces a different decision. A walkthrough that lists where to find each enemy can read like a checklist, but a walkthrough that groups enemies by behaviour pattern is more useful when you are planning a route. The table below groups the recurring threats by the player behaviour they reward.
| Enemy | Where it appears | Behaviour cue | Player behaviour it rewards | Counter resource |
|---|---|---|---|---|
| Village Ganado | Act 1, scattered groups | Charges in line, attacks with farm tools | Aim at the legs, use the environment to break line of sight | Handgun or shotgun, knife for grapples |
| Chainsaw enemy (Dr. Salvador) | Random encounters in Act 1 and 2 | Revving chainsaw, runs straight at the player | Avoid, do not engage in a small room | Shotgun blast to the head or environmental kill |
| Armored Knight | Castle halls | Shield and halberd, slow but durable | Stagger the shield arm, then shoot exposed head | Shotgun or rifle, avoid melee |
| Garrador | Castle dungeon | Blind, tracks by sound, fast melee | Move slowly, bait attacks, hit exposed parasite | Rifle or bowgun, knife as a last resort |
| Verdugo | Castle lab | Subterranean chase, acid spit | Keep distance, use the ceiling trap, do not waste rifle ammo on limbs | Freeze rounds or a well-timed trap |
| Regenerador | Island facility | Reanimates after a few seconds, parasites drive combat | Aim for the glowing parasites, not the body | Thermal scope, rifle with high power |
| Iron Maiden | Island facility | Spiked form, high damage close range | Maintain distance, use flash or sniper rifle | Magnum or rifle, do not engage with a handgun |
| Jack Krauser | Island ruins and later chase | Knife duel phase, then ranged phase | Block timing in the knife duel, cover use in the ranged phase | Handgun for the duel, rifle for the chase |
Reading the table alongside a walkthrough turns each encounter into a known cost. The player who understands that an Armored Knight is a stagger puzzle rather than a damage race is going to spend fewer resources on the first attempt, which leaves more resources for the next encounter. That is the loop the designers built into the campaign.
Resource economy, merchant cycles, and the upgrade priority
Resource economy is the second design lesson of the campaign. Pesetas come from kills, treasure, and the blue medallion or shooting range challenges. They leave the player’s inventory through upgrades, weapon purchases, healing item restocks, and repair. The game never explicitly tells the player that the merchant is the central hub of the campaign, but the merchant’s inventory and the player’s purse are the most reliable predictor of how the next act will feel.
A walkthrough that includes merchant advice is more useful than one that does not. The advice is not about which gun is the strongest. It is about which spending pattern leaves the player the most flexibility across all three acts. The list below is a starting point. Adjust it to the player’s own run, because the actual sequence of encounters is the strongest signal of what the next spend should be.
Spend pattern that holds across both versions
- First visit: do not buy a new weapon. Upgrade the handgun stock for capacity and reload, and save the remaining Pesetas for the first attache case expansion. Inventory space is the strongest early multiplier.
- Second visit: pick one crowd control weapon. The Riot Shotgun in the 2005 release and the Skull Shaker in the 2023 remake both do the same job of thinning groups at close range. Upgrade it once and stop until the next act.
- Mid-campaign: invest in a precision weapon only after the crowd control weapon is in a stable state. The rifle or the bowgun pays off in the castle and the island.
- Late campaign: spend on magnum rounds and healing item restocks before saving for the Chicago Typewriter or the Infinite Rocket Launcher. The player who reaches the final boss with a full magnum and a stocked first-aid kit has the most options in the closing phase.
The 2023 remake’s crafting system layers over the merchant system. The player can now combine herbs into stronger healing items and combine gunpowder into specific ammunition types. The walkthrough’s advice is to keep at least two herbs and one gunpowder in the inventory for crafting, even when the player can afford a ready-made version of the same item, because crafted items often cost less Pesetas and the same raw materials.
Save rooms, attache case management, and pacing
Save rooms are the second resource layer the game manages. They restore health only in the 2005 original, they restore health and provide a merchant in the 2023 remake, and they always provide a save point, an attache case, and a typewriter. The walkthrough’s job is to make sure the player uses save rooms deliberately rather than reactively. A player who enters a save room with a half-empty inventory and a damaged weapon has already lost part of the upcoming fight.
Pre-fight checklist at every save room
- Inventory: combine herbs, sell treasure, free at least one attache case row.
- Healing: enter the next segment with at least one ready-made healing item and enough materials to craft a second.
- Weapons: repair the equipped weapon if durability is below half, especially before a boss room.
- Ammunition: check the count for the equipped weapon and the next-strongest weapon. The player should never start a fight with one magazine of their main weapon.
Pacing is the result. A For additional context, walkthrough that does not mention save rooms reads like a route map. A walkthrough that mentions them at every chapter transition reads like a pacing guide, and pacing is what keeps the player from feeling rushed in the closing mission.
Bosses and mid-bosses as design checkpoints
Bosses in Resident Evil 4 are not just harder enemies. They are the moments where the game forces the player to demonstrate the skill the previous act was teaching. The walkthrough is most useful here because boss behaviour is the most version-sensitive part of the campaign. The 2005 release and the 2023 remake share the same names, the same set-pieces, and similar vulnerability windows, but the actual timing and the camera behaviour differ.
| Boss | Where it appears | Phase behaviour | Key resource | Common first-attempt mistake |
|---|---|---|---|---|
| El Gigante | Act 1, farmlands | Two phases, vulnerable to environmental kill with the bell | Rocket launcher if available, otherwise high-power rifle shots | Forgetting the bell or standing in front of the charge |
| Del Lago | Act 1, lake sequence | On-board harpoon fight, no ground combat | Harpoon and timed throws, knife for hazards | Throwing harpoons too early, missing the rhythm |
| Mendez | Act 1, village chieftain hut | Ground combat, exposed parasite, second form in the 2023 remake | Shotgun for stagger, rifle for parasite, magnum for the second form | Spending magnum on the first form |
| Two Garradors | Act 2, castle dungeon | Back-to-back blind mid-bosses | Rifle for parasites, knife for backup | Fighting in a narrow corridor without sight lines |
| Verdugo | Act 2, castle lab | Chase ceiling, optional boss that can be skipped | Freeze rounds or traps | Wasting rifle ammo on the limbs |
| U-3 | Act 3, ruins | Multi-phase, eye vulnerability, rampage form | Heavy rifle, magnum, or assigned cannon | |
| Final boss (Saddler) | Closing mission | Multiple phases, environmental interactions | Full reserve of magnum, stocked healing items | Entering the fight with empty healing and damaged weapons |
The table is not a substitution for a detailed boss guide. It is a design summary. Each boss rewards a specific skill: positioning, timing, resource management, or vulnerability reading. The walkthrough should reinforce that link, because the skill the boss teaches is the same skill the next act will demand against regular enemies.
How the 2026 remake changes the walkthrough
The remake is not a different game, but it changes enough that a walkthrough written for the 2005 release can mislead a new player. The most important differences are mechanical rather than cosmetic. The 2023 version rebuilt the aiming system, added a parry knife, gave Ashley a command system, restructured the merchant’s side content, and added stealth in specific rooms. Each change affects what a walkthrough should recommend.
Mechanical differences that change route planning
- Parry knife: the player can now time a knife block to stagger an enemy attack. The parry is the strongest early-game defensive tool, and a walkthrough should mention it the first time the player meets a charged attack. The original game did not have a parry, and a 2005 walkthrough that says “block” usually means a different input.
- Stealth rooms: the remake adds rooms where the player can crouch, throw a bottle, and clear a small group without firing. The walkthrough should indicate which rooms reward stealth because the ammo saving is significant.
- Ashley command system: the player can now order Ashley to wait in safe zones, which is the strongest single change to escort segments. The walkthrough should name the safe zones because the player who misses them can still finish the game but at a higher resource cost.
- Requests: the merchant’s Requests are side goals that the player can complete for Pesetas and unique rewards. The walkthrough should distinguish Requests that can be picked up on the way through the campaign from those that require backtracking, because backtracking is a real cost in a single-pass run.
For a player who is choosing between the two versions, the practical difference is that the 2023 remake is more forgiving of inefficient play because the parry system and the crafting system absorb mistakes that the 2005 release punishes. A walkthrough that does not mention either system can leave a new player with an experience that feels out of step with the writer’s expectations.
Accessibility, difficulty modes, and how they change pacing
The 2023 remake ships with four difficulty modes that change more than enemy damage. Assisted reduces incoming damage and increases aim assist, which is the most generous mode for a first-time player. Standard matches the developer’s intended baseline. Hardcore removes aim assist, reduces healing item effectiveness, and tightens enemy placement. Professional adds enemy damage, removes item drops from dead bodies, and changes merchant pricing. The 2005 original had a separate Professional Mode unlockable from the start in some releases and after a first completion in others, and it changes the same baseline.
Accessibility options in the 2023 remake include aim assist strength, controller remapping, subtitle scaling, and reduced motion. The walkthrough should not assume any specific setting, but it should call out moments when reduced aim assist or reduced motion settings change a fight. The chainsaw enemy in the village is harder on Hardcore than on Standard not because the enemy is faster, but because aim assist is gone and the player’s handgun has more recoil.
What changes by difficulty tier
- Ammo economy: lower difficulties give the player more bullets because enemies take more damage and drop more rounds. Higher difficulties make every bullet a decision.
- Healing: lower difficulties restore more health per item. Hardcore and Professional reduce the healing effect, which makes the save room restore from the typewriter more important.
- Stagger: lower difficulties make the player harder to stagger. Higher difficulties let enemies break the player’s aim, which is a major change to shotgun fights.
- Merchant pricing: Professional mode in the 2023 remake increases weapon and upgrade costs, which compresses the merchant cycle and makes early upgrades more important than late ones.
Speedrun and minimum-route considerations
A walkthrough aimed at finishing the campaign quickly is a different document. Speedrunners skip encounters, use the merchant only for mandatory purchases, and chain knife and grenade parries to skip mid-bosses. The walkthrough above does not follow that route, but it is worth understanding the speedrun layer because the same route is useful for an experienced player who wants to learn the campaign’s structure without spending ten hours on the first run.
The 2023 remake added the The Mercenaries mode, which is a separate score attack. The walkthrough for the main campaign does not cover The Mercenaries, but the merchant upgrades the player makes in the main campaign do not transfer into the mode, which means the player who wants a high score should treat the mode as its own self-contained design problem rather than as an extension of the main game.
Studying the walkthrough as a level design reference
For a developer or a level designer, the most useful way to read a Resident Evil 4 walkthrough is to ask three questions at every chapter transition. Where did the game change the player’s expected behaviour? Where did the game change the player’s available resources? And where did the game change the player’s information about the next room? The answers to those three questions mark the moments when the designer chose to teach a new rule. A walkthrough that calls out those moments turns the document from a route guide into a level design study.
The same exercise applies to the remake’s Requests. Each Request is a small design loop with a clear goal, a clear reward, and a clear risk. Studying how the Requests fit into the wider chapter flow is a useful exercise for any developer who is designing progression content for an action game with a fixed route, because the Requests show how a small side goal can be inserted into a linear campaign without breaking the main pacing.
What to carry into another third-person action game
The walkthrough is also useful as a reference when you are designing or analysing a different game. Resident Evil 4 sits in a wider family of third-person action games that includes later entries in the same franchise, the Dead Space series, The Last of Us, Bayonetta, and several modern indie titles. The portable design ideas from this walkthrough are not specific to Resident Evil 4, and a reader who extracts them gets a vocabulary they can use on the next project.
- Teach a new rule at every chapter transition. The 2005 release and the 2023 remake both follow that pattern, and the pattern is one of the strongest reasons the campaign remains readable on a replay.
- Tighten a resource budget at the start of a new act. The island’s higher difficulty is paired with higher ammo income, but the higher income does not outpace the higher spending. A balanced budget is more important than a generous one.
- Make the merchant the hub of the campaign. The merchant’s inventory is the player’s main opportunity to spend resources, and a game without a hub wastes the player’s urge to make progress between fights.
- Pair every new enemy with a behaviour change for the player. The Garrador forces the player to slow down, the Regenerador forces the player to use a new tool, and the Iron Maiden forces the player to keep distance. A walkthrough that calls out the change is more useful than one that lists stats.
Working with the verified sources and what they confirm
The campaign structure and the chapter count above describe the 2005 original and the 2023 remake based on the game’s published documentation and the public coverage of the remake’s release. A wider overview of the series’ history and its place in the survival horror genre is documented in the broader Resident Evil article, which records the franchise’s evolution from 1996 to the present, the role of each mainline entry, and the genre shifts that Resident Evil 4 introduced. The article frames Resident Evil 4 as the entry that moved the franchise away from fixed-camera survival horror toward an over-the-shoulder action model, and it identifies the 2023 remake as a faithful modernisation rather than a full reboot. The Guardian’s long-form feature on Resident Evil 4 at 20 reaches a similar conclusion from a critical and design perspective, summarising the 2005 release as the entry that revitalised the survival horror genre and identifying the camera, the merchant, and the resource economy as the design decisions that the rest of the industry still imitates. Both sources support the framing in this walkthrough without adding any details the rest of the article does not already cover.
Frequently asked questions
How many chapters does the walkthrough cover in each version?
The 2005 original ships with twenty numbered chapters plus a closing mission. The 2023 remake condenses the same structure into sixteen chapters. Both versions cover the same three-act arc, which means the chapter count is a useful first check for the player who is reading a walkthrough written for the other version.
What is the most important early upgrade in either version?
The first upgrade the player should buy is the attache case expansion, not a new weapon. Inventory space is the strongest early multiplier because it lets the player carry more healing items, more ammo, and more treasure to the merchant. Weapon upgrades come second, and the first weapon upgrade should usually be a capacity or reload improvement to the player’s starting handgun.
Where is the first safe place to save in the village?
The first save room is reached through the village square after the initial crowd fight. The room contains a typewriter, an attache case, and in the 2023 remake a merchant. Treat that room as the first checkpoint of the campaign and use it to repair the handgun, sell any duplicate treasure, and combine herbs before the next segment.
How does the Ashley escort segment work in the 2026 remake?
The 2023 remake adds a command system that lets the player order Ashley to wait in a safe zone. The walkthrough should identify the safe zones in the castle and the island because the player who uses them can keep Ashley out of the line of fire, which frees the player to use healing items only on themselves. In the 2005 original the player does not have a command system, and Ashley follows the player automatically.
What is the best weapon against the Regeneradors?
The Regeneradors are vulnerable to rifle rounds aimed at the glowing parasites. The 2023 remake introduces a thermal scope that highlights the parasites for the player. In the 2005 original the player has to learn the parasite positions by sight, which is why a walkthrough that names the spawn points is useful for first-time players. A magnam will stagger a Regenerador, but rifle rounds are more ammo-efficient.
Can the player skip the castle’s Verdugo mid-boss?
Verdugo is the most optional mid-boss in the campaign. The player can leave the lab and skip the fight, but the player who completes the fight earns a unique upgrade. The walkthrough should call out the skip option because the player who is short on healing items can choose to come back later, although backtracking through the castle after a mid-boss is not always possible.
What is the difference between Hardcore and Professional mode in the remake?
Hardcore removes aim assist, reduces healing item effectiveness, and tightens enemy placement. Professional adds higher enemy damage, removes item drops from dead bodies, and increases merchant prices. The practical difference is that Hardcore tests the player’s aim and resource budget, while Professional tests the player’s route planning and merchant decisions. A walkthrough written for Standard is not always accurate for either of the two higher modes.
Does the merchant’s inventory carry over between visits?
Yes. The merchant’s stock expands as the player progresses through the campaign, and unique items such as the Chicago Typewriter or the Infinite Rocket Launcher become available only after the player has reached a specific chapter. The walkthrough should mention the merchant’s unique inventory because the player who is reading for the first time often does not know which items are exclusive to a specific point in the campaign.
How long is a typical first run of the campaign?
A first run of the 2005 original is typically twelve to fifteen hours for a new player who reads the environment, and eight to ten hours for an experienced player. The 2023 remake is similar, although the new side content adds two to three hours when the player completes the merchant’s Requests. A speedrun is significantly shorter, but speedruns are a separate exercise and not what a walkthrough is designed to support.
What should the player do before the final boss attempt?
Enter the closing mission with a full attache case, at least one magnum, a stocked first-aid kit, and a repaired main weapon. The final boss has multiple phases and punishes the player who enters with low resources. The walkthrough should treat the last save room before the final boss as a hard checkpoint, because the player who reaches the final boss with empty resources has to replay the closing mission from the last save.





Leave a Reply